Your computer provides expansion slots for the following cards:
In the small form-factor computer, one low-profile, 32-bit, 33-MHz PCI card.
In the small desktop computer, up to two 32-bit, 33-MHz PCI cards.
In the small mini-tower computer, up to four 32-bit, 33-MHz PCI cards.
NOTE: Before
disconnecting a device
from the computer or
removing a component
from the system board,
verify that the auxiliary
power light on the system
board is off. For the
location of this light, see
"System Board
Components."
CAUTION: Some network cards automatically start the computer when they are connected. To guard against electrical shock, be sure to unplug the computer from its electrical outlet before installing any expansion cards.
Prepare the expansion card for installation.
See the documentation that came with the expansion card for information on configuring the card, making internal connections, or otherwise customizing it for your computer.
Raise the lever that covers the card-slot opening on the back of the
computer.
If there is a filler bracket, remove the filler bracket by raising the
hinged lever and sliding the bracket up.
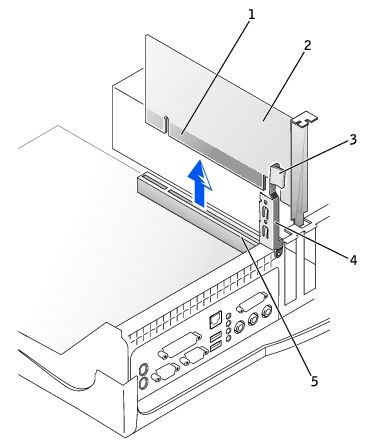
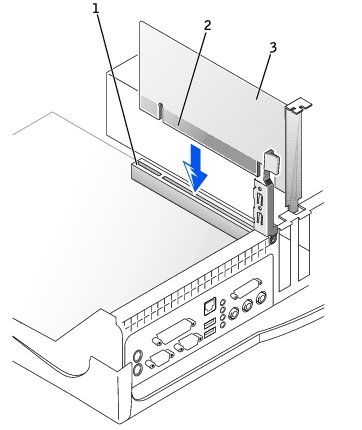
Replacing an Expansion Card—Small Form-Factor Computer
1
Expansion-card connector
2
Card-edge connector
3
Expansion card
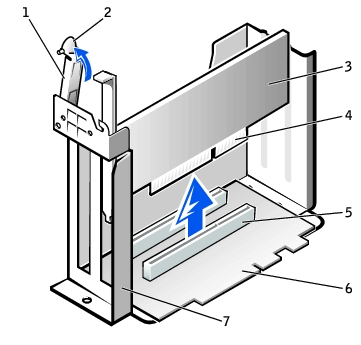
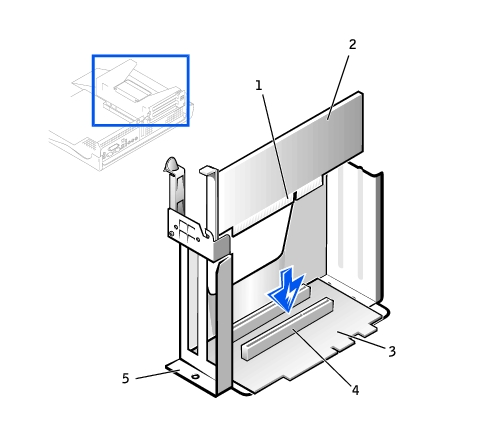
Replacing an Expansion Card—Small Desktop Computer
1
Card-edge connector
2
Expansion card
3
Riser board
4
Expansion-card connector
5
Expansion-card cage
Place the expansion card on the connector and press down firmly.
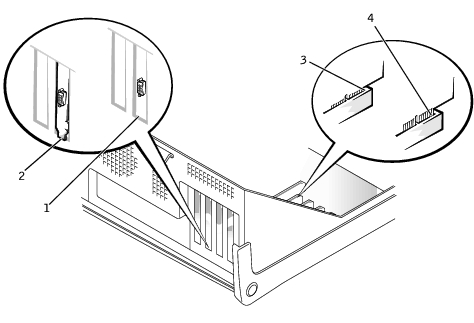
Make sure that the card is fully seated in the slot.
If the expansion card is full-length, insert the end of the card into the expansion-card guide bracket as you lower the card toward its connector on the system board. Insert the card firmly into the expansion-card connector on the system board.
Expansion Card Connection
1
Bracket within slot
2
Bracket caught outside of slot
3
Fully seated card
4
Not fully seated card
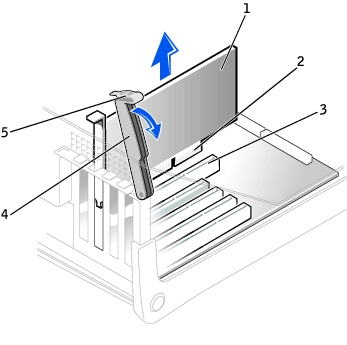
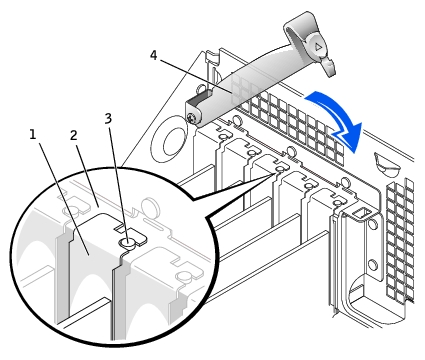
Replacing an Expansion Card—Small Mini-Tower Computer
1
Filler bracket
2
Alignment bar
3
Alignment guide
4
Retention arm
Before lowering the retention arm, make sure of the following:
Tops of all expansion cards and filler brackets are flush with the alignment bar.
Notch in the top of the card or filler bracket fits around the alignment guide.
Press the arm into place, securing the expansion card(s) in the computer.
Connect any cables that should be attached to the card.